 The principle of fiber optic splicing is to melt, or join, two optical fibers together end-to-end using heat created with a machine called a Fusion Splicer.
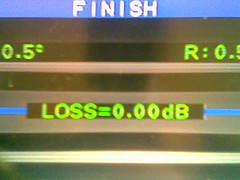
Your objective while splicing is to obtain a splice with an estimated loss of no more than 0.01db loss displayed by the machine as well as a physical visible check verifying correct core alignment. A 0.00db loss (odd buck) on the lid is not always a good splice.
Follow these simple steps to make a 144ct fiber splice locations go as easy as apple pie. This process only works if the fibers have been properly cleaned with DeGel and that it has been fully neutralized with alcohol.
What are the things to keep in mind when splicing fiber optic cables?
Dirt is the enemy. Keep it clean!
If you want a stress free day behind the screen the first thing you want to do is clean all equipment and tools to be used in the process of splicing the fiber.
This starts with your work surface be it a table or counter top. Clean all foreign debris from the surface using a small amount of **alcohol and paper towel.
Second item up is the fusion machine. It should be clean from the last time you put it in the box. Clean off the top of the fusion splicer before opening wind cover.
DO NOT use canned air!
Clean v-grooves and objective lenses with a clean soft swap made for the task. DO NOT use a regular Q-tip!
If large debris like dust, pigment from fiber or dirt can be seen in the v-groove you can cleave a fiber and use the cleaved end to push the object out of the groove. Push the foreign objects towards the outside of the machine to avoid filling your splicer up like a trash bin.
Clean cleaver and strippers. Air can be used but be careful as loose fiber shards can turn into speeding bullets.
Tools and Consumables Used
Fusion machine
Cleaver
Strippers
Shrink sleeve
Kim-wipe
**99.9
The Steps
Pre-fuse
This section refers to field calibrating the fusion splicer. This involves two strands of optical fiber and arc calibration mode of the splicer.
- Set fusion splicer mode to Arc Calibration
- Remove the pigment from test fibers (Strip approximately 30 microns)
- Use a kim-wipe to remove excess material left on the fiber after stripping
- Use a new kim-wipe lightly saturated with 99.9% isopropyl alcohol
- Clean fiber. Listen for “squeaky” sound
- Move the clean fiber directly to the cleaver
- For 250μ fiber cleave at 12μ microns
- Move the cleaved fiber directly to the v-groove on the fusion splicer
- Continue with arc calibration until test passes
The Act
- Remove the pigment from all optical fiber strands in tray
- Use a kim-wipe to remove excess material left on the fiber after stripping
- Slide one shrink on all strands either on the left or right set
- Use a new kim-wipe lightly saturated with 99.9% isopropyl alcohol
- Clean fiber. Listen for “squeaky” sound
- Move the clean fiber directly to the cleaver
- For 250μ fiber cleave at 12μ microns – For 900μ cleave at 18 microns
- Move the cleaved fibers directly to the v-grooves on the fusion splicer
- Hit set button and observe action of splicer on view finder.
*Accept cleave angles under 1 degree
*If cleaved fiber has a chipped face go to Act 1 - Observe estimated splice loss data
* 0.02db loss or greater go to Act 1
*If there are imperfections across the fused area go to Act 1 - Move fiber from v-grooves to heater for final shrinking
*Make certain fused area of fiber is centered in shrink sleeve
**Use only 99.9% isopropyl alcohol
Have a good day!
